
I have different sensor nodes at home that publish measurements at regular intervals to a Raspberry Pi. The data is stored on the RPi and in a cloud service and can be viewed with various applications. As my most common use case is to view the latest value of a particular sensor, I would like to have a mounted low-powered display in the kitchen to show the latest values from my sensors.
In this post I will show how I have used an Adafruit Feather Huzzah and a FeatherWing OLED that monitors the latest messages from my sensors. To get out of my normal comfort zone (Arduino IDE with C/C++), I will use MicroPython for the implementation.
Background
MQTT is a lightweight messaging protocol that uses publish/subscribe through a message broker. I have a mosquitto broker running as a service on my Raspberry Pi 3. The RPi has other services running that are setup to either subscribe to MQTT topics or publish MQTT topics. Other protocol inputs to the RPI (like 433MHz chirps) are transformed to MQTT messages, so all sensor data are available for any MQTT subscriber on my local network.
Hardware setup
As a sensor monitor I will use an Adafruit FeatherWing OLED connected to an Adafruit Feather Huzzah board.
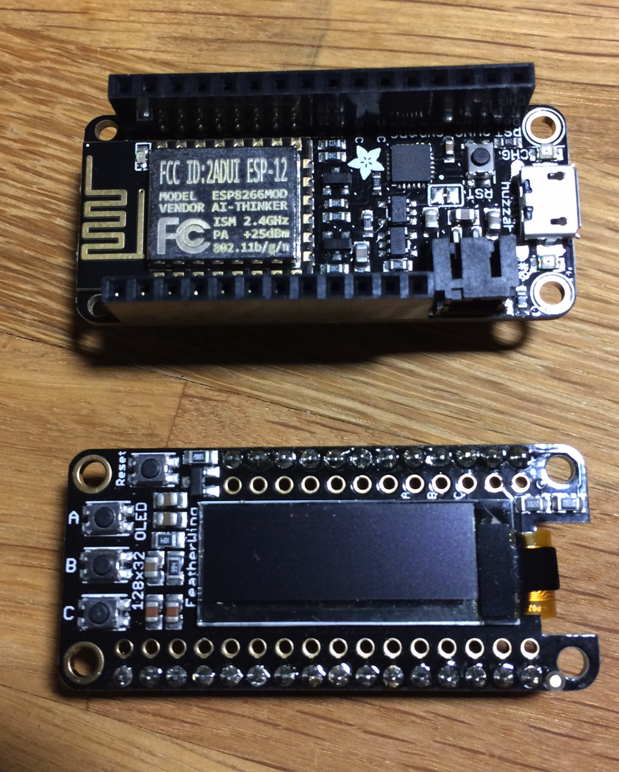
I have soldered female headers on the Huzzah, so the FeatherWing can be mounted on top. The OLED FeatherWing has a 128×32 SSD1306 OLED display and three buttons that will be connected to Pins 0, 16 and 2 when the Wing is on top of a Huzzah.
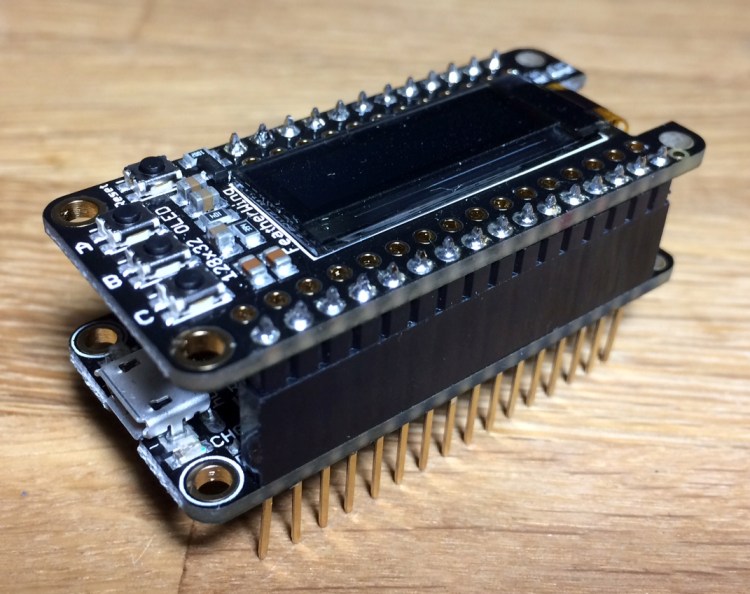
The FeatherWing uses I2c for communication with the Huzzah and with the smart design of the FeatherWing, the wiring of the communication pins is just plug & play. You can stack any number of FeatherWings to build a huge stack of “outboards”. The display board should obviously be on the very top to be useful, though.
Programming
I have covered the basics of flashing and programming an ESP8266-based board with MicroPython in a previous post:
so I will not go into details about MicroPython, ampy and the REPL here. For this project I used v1.8.5 of MicroPython for ESP8266. I had problems getting v1.8.6 working correctly so switch to an earlier version.
My new MicroPython script needs to perform the following things:
- Connect to a WiFi network
- Setup an MQTT subscription
- When a message arrives, display it on the OLED screen
- When a button is pressed, browse though a list of the latest message for each topic and display the each message on the OLED screen
Networking basics
An ESP8266 can act as an access point or as as a station/client that connects to a router. To connect my board to the local LAN, I use a method like this:
This file contains hidden or bidirectional Unicode text that may be interpreted or compiled differently than what appears below. To review, open the file in an editor that reveals hidden Unicode characters.
Learn more about bidirectional Unicode characters
| import network | |
| import utime | |
| def setup_wifi(): | |
| sta_if = network.WLAN(network.STA_IF) | |
| sta_if.active(True) | |
| # Replace with your SSID and WiFi password | |
| sta_if.connect('SSID', 'PASSWORD') | |
| while not sta_if.isconnected(): | |
| utime.sleep(1) |
It may take a little time after connect() until the board has received a proper connection. Thus, a loop that waits for the connection to be complete is needed before continuing with code that depends on a working network connection (like connecting to an MQTT broker).
MQTT library
After a network connection has been established, we can create an MQTTClient with a callback to use when a message arrives. Then call connect() to setup a socket connection to a MQTT broker and define what messages to subscribe to. A message polling loop is needed with repeated calls to check_msg(). An alternative is to use wait_msg(), but this would block the script from further execution.
This file contains hidden or bidirectional Unicode text that may be interpreted or compiled differently than what appears below. To review, open the file in an editor that reveals hidden Unicode characters.
Learn more about bidirectional Unicode characters
| from umqtt.simple import MQTTClient | |
| import utime | |
| c = MQTTClient("umqtt_client", "192.168.1.16",port=1883) | |
| c.set_callback(mqtt_message_received) | |
| c.connect() | |
| c.subscribe("Home/#") | |
| while True: | |
| c.check_msg() | |
| utime.sleep(0.5) |
My topic hierarchy has the format Home/Location/MeasurementType. For example:
Home/GroundFloor/Temperature
Home/GroundFloor/Humidity
Home/Outdoor/Temperature
Home/Garage/Humidity
Home/TopFloor/Pressure
Home/FrontDoor/Status
Subscribing to Home/# means that all messages with a top level topic Home will be sent to my callback method.
OLED library
Adafruit has made a MicroPython library for the SSD1306 OLED. Follow the instructions in this link on how to obtain the library and put it on the board. To use the library from a MicroPython script, I2c has first to be setup. This is then used for creating an oled object that supports text output to a defined pixel position on the screen.
This file contains hidden or bidirectional Unicode text that may be interpreted or compiled differently than what appears below. To review, open the file in an editor that reveals hidden Unicode characters.
Learn more about bidirectional Unicode characters
| import machine | |
| i2c = machine.I2C(machine.Pin(5), machine.Pin(4)) | |
| import ssd1306 | |
| oled = ssd1306.SSD1306_I2C(128, 32, i2c) | |
| oled.fill(0) | |
| oled.text("First line", 0, 0) | |
| oled.text("Second line", 0, 10) | |
| oled.text("Third line", 0, 20) | |
| oled.show() |
The main script
Here is the main script that can be used as a main.py script on the board. The files/modules oled_message_display.py and wifi_connection.py also need to be put on the board.
This file contains hidden or bidirectional Unicode text that may be interpreted or compiled differently than what appears below. To review, open the file in an editor that reveals hidden Unicode characters.
Learn more about bidirectional Unicode characters
| from umqtt.simple import MQTTClient | |
| import utime | |
| from machine import Pin | |
| import oled_message_display | |
| import wifi_connection | |
| last_messages = {} | |
| def mqtt_message_received(topic, msg): | |
| # add or update the latest stored message for this topic | |
| last_messages[topic] = msg | |
| # and display it on the screen | |
| oled_message_display.show_message(topic, msg) | |
| def show_message_with_idx(msg_to_show): | |
| if len(last_messages) == 0: | |
| return | |
| try: | |
| idx = 0 | |
| for topic, msg in last_messages.items(): | |
| if idx == msg_to_show: | |
| oled_message_display.show_message(topic, msg) | |
| break | |
| idx = idx + 1 | |
| except: | |
| oled_message_display.show_message("error", "error") | |
| # Connect to wifi | |
| wifi_connection.setup_wifi() | |
| # Show an initial message | |
| oled_message_display.show_message("Waiting for","messages…") | |
| # Setup up MQTT | |
| c = MQTTClient("umqtt_client", "192.168.1.16",port=1883) | |
| c.set_callback(mqtt_message_received) | |
| c.connect() | |
| c.subscribe("Home/#") | |
| # B-button on the Feather OLED is connected to | |
| # pin 16 on the Feather Huzzah board | |
| button_B = Pin(16, Pin.IN) | |
| # | |
| # Poll for messages and check if the B-button is pressed | |
| # (if pressed, the next topic's message should be shown) | |
| # | |
| msg_to_show=0 | |
| while True: | |
| if button_B.value() == 0: | |
| msg_to_show = msg_to_show + 1 | |
| if msg_to_show > len(last_messages): | |
| msg_to_show = 0 | |
| show_message_with_idx(msg_to_show) | |
| c.check_msg() | |
| utime.sleep(0.5) |
When a message arrives to the subscription callback method, the topic string on the form Home/Location/MeasurementType is split so that Location and MeasurementType are displayed on separate rows on the OLED. The third row is used for displaying the actual message/sensor value. For my Home/Outdoor/Temperature topic, a message looks like this:

A dictionary is used for storing the latest message for each topic. When the B-button is pressed on the board, the display is updated with the message from the next topic in the dictionary.
All code from this project can be fetched from GitHub:
https://github.com/LarsBergqvist/micropython_playground
